What to Do Immediately After a Storm Damages Your Roof
Introduction:
When a storm hits, it can cause significant damage to your roof, leaving your home or commercial building vulnerable to further destruction. It’s important to act quickly after a storm to minimize the damage and keep your property safe. In this blog post, we will discuss the steps you should take immediately after a storm damages your roof. From inspecting the damage to contacting professionals for roof repair, we’ve got you covered.
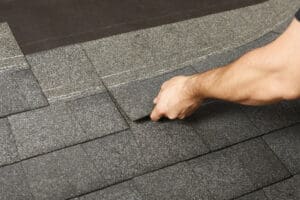
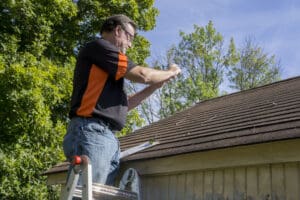
Step 1: Conduct a Visual Inspection
After a storm, the first thing you should do is visually inspect your roof for any signs of damage. Look for missing or broken shingles, dented or cracked flashing, and any other visible signs of storm damage. If you spot any issues, it’s crucial to document them by taking clear photographs. These photos will come in handy during the insurance claims process.
Step 2: Assess the Interior
While inspecting the exterior of your roof is important, don’t forget to assess the interior as well. Check for any signs of water leaks, such as water stains on your walls or ceiling, damp spots, or visible dripping. If you notice any of these warning signs, it’s a clear indication that your roof has been compromised and needs immediate attention.
Step 3: Secure Your Property
If you find that your roof has suffered significant damage, it’s important to secure your property to prevent further destruction. Place tarps or coverings over any exposed areas to prevent rainwater from seeping into your home or business. This temporary solution will help mitigate additional damage until professional repairs can be made.
Step 4: Contact Your Insurance Provider
Once you have completed the initial assessment of the storm damage, it’s time to contact your insurance provider. Notify them about the situation and provide them with the photographs you captured during your visual inspection. Make sure to document any conversations you have with the insurance company, noting the date, time, and names of the representatives you speak to. This documentation will be valuable for your claim.
Step 5: Hire a Professional Roofing Contractor
When it comes to repairing storm damage, it’s always best to hire a professional roofing contractor. They have the expertise and experience to assess the extent of the damage and provide appropriate solutions. Look for reputable contractors in your area who specialize in storm damage roof repair. Request quotes from multiple contractors and compare their services and pricing before making a decision.
Step 6: Schedule a Roof Inspection
After selecting a roofing contractor, schedule a thorough roof inspection. A qualified professional will assess the damage in detail and provide you with a comprehensive report. This report will outline the necessary repairs, estimated costs, and a timeline for completion. It’s crucial to have this information to make informed decisions about your roof repair.
Step 7: Begin Repairs
Once you have received the report from your roofing contractor, it’s time to begin the repair process. Work closely with your contractor to understand the scope of the repairs and ensure they align with your budget and timeline. Keep in mind that storm damage roof repair may take some time, especially if there are widespread issues in your area. Patience and open communication with your contractor will help facilitate a smooth repair process.
Conclusion:
Dealing with storm damage to your roof can be stressful, but taking immediate action is crucial. By following the steps outlined in this blog post, you can minimize the damage and protect your property. Remember to conduct a visual inspection, assess the interior, secure your property, contact your insurance provider, hire a professional roofing contractor, schedule a roof inspection, and begin repairs. Acting swiftly will ensure that your roof is restored effectively, keeping your home or commercial building safe for years to come.